Setting up an EMF/JET testing project with JUnit and Eclipse
GMF Code Samples / GMF / EMF
So the idea of this article is to set up an environment where you can test a JET plugin in terms of its ??? from an EMF model, using JUnit so it is easy to test the output.
- Get a JET plugin working through Eclipse and making it possible to run it in a runtime application (org.openiaml.test.uml3.generate.ejet).
Create the project with dependencies:
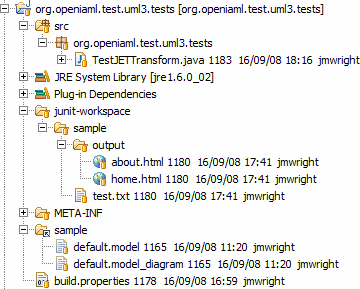
- Create a new project for your tests (org.openiaml.test.uml3.tests).
- Right click the project and go PDE tools > Convert Projects to Plug-in Projects…
- Open up the build.properties file and select the Dependencies tab - we will be adding some additional build requirements
- Add org.eclipse.jet, org.eclipse.core.runtime, org.eclipse.core.resources, org.openiaml.test.uml3.generate.ejet and org.junit (3.x).
Load the sample files:
- Create a folder called ‘sample’ in the project directory, and place your sample models there.
Create the runtime workspace:
- Create a folder called junit-workspace in the project directory.
- We need to initialise this workspace so that our test cases may write to it.
- Start a new [[Eclipse]] instance and use this as the root workspace.
- Create a new empty project called sample.
- Save and close that editor.
Create the test case:
- Create a new TestCase which calls the JET template editor.
- An example is provided in http://iaml.svn.sourceforge.net/viewvc/iaml/trunk/examples/jet/TestJETTransform.java?view=markup
Set up the test case runtime option in Eclipse:
- Select the TestCase and go Run As > Open Run Dialog…
- If it doesn’t already exist, select JUnit Plug-in Test and create a New launch configuration
- Select the Main tab, and change the Workspace Data Location to the junit-workspace folder created before (click on the Workspace… button)
- Disable the clear option, or at least tell it to not delete the workspace data (we need the workspace to remain initialised between runs)
- Make sure that all your EMF and JET generation plugins are enabled on the Plugins tab
You should now be able to run the JUnit test and it will generate the content into an output folder in the junit-workspace workspace folder, for example. Once you have generated this content, you could then use various JUnit tests to test the generated content, e.g. loading XML files and checking the content, etc.
An easier way
There’s an easier way to do most of this – in particular, we can just get the JUnit test to create the runtime workspace and associated files by itself! But this will only work if you are running your test cases as JUnit Plug-in Test in Eclipse. (Reference: Creating Eclipse projects)
In your setUp(), you can create a new project programatically:
protected IProject createProject() throws CoreException {
  // create a new project automatically
  IWorkspace workspace = ResourcesPlugin.getWorkspace();
  IWorkspaceRoot root = workspace.getRoot();
  IProject project = root.getProject(PROJECT_NAME);
  // delete any existing ones
  if (project.exists()) {
    project.delete(false, monitor);
  }

  // create it
  project.create(monitor);
  assertTrue(project.exists());
  project.open(monitor);

  return project;
}
You can now access files in this created project easily:
public void testSitemap() {
  doTransform("models/simple.iaml");
  IFile sitemap = project.getFile("output/sitemap.html");
  assertTrue("sitemap " + sitemap + " exists", sitemap.exists());
}
The source code for this easier-to-run JUnit test is available on SVN.